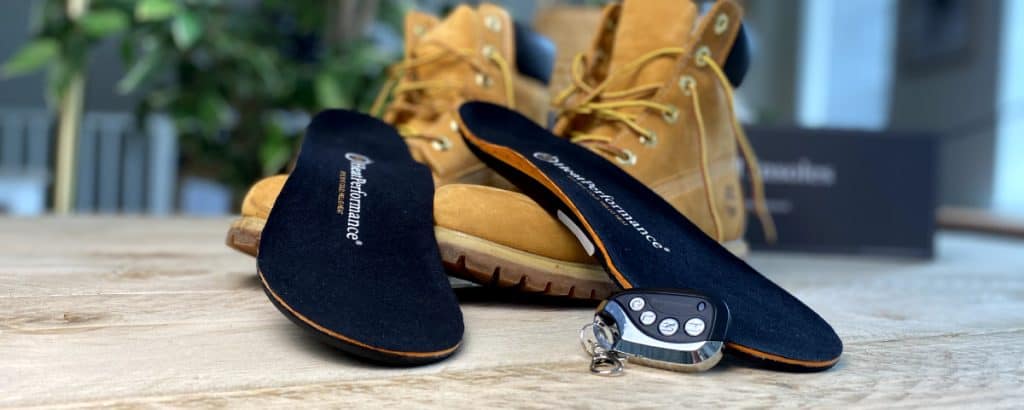
How do you pair the remote control with our heated soles?
We have already linked the remote control to the soles for you. So normally, you don’t have to worry about this and you can immediately enjoy warm feet with your new heated insoles. The explanation below applies to our PRO heated insoles and CLASSIC heated insoles.
Only in these cases is it necessary to pair the remote control
- In case you have replaced your remote control batteries.
- In case you received a new remote control from us.
- We hope not, of course. But in case the insoles are not paired by mistake, this information is also relevant to you.
Roadmap for pairing the remote control:
1
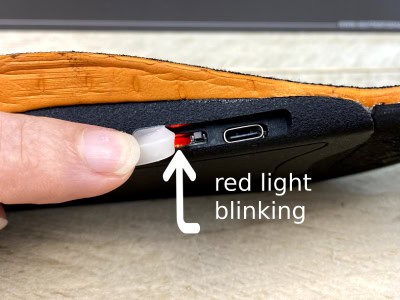
- Press and hold the power button on the side of the insole until the red light begins to illuminate. Do the same with the other insole.
2
- Press on/off briefly 3 times so that the red light will flash. Do the same with the other insole.
3
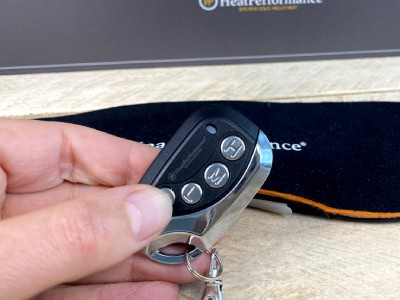
- Press any button on the remote control, the indicator stops flashing, pairing is done.
Good to know

Want to adjust the heat settings?
This can be done either by briefly pressing the button on the side of the sole or by using the buttons on the remote control. There are 3 heat settings:
- Red: Highest heat setting
- Orange: Medium heat setting
- Green: Lowest heat setting
Standby mode
If you turn off the insoles with the remote control, the battery goes into standby mode. The battery drains slowly in this case.
Using the remote control, the insoles can also be turned back on from standby mode.
Are you done wearing and want to expand the insoles?
Then do not use the remote control but press the button on the side of the sole for a few seconds. Now the insole is really off.
Turning the insoles on now cannot be done with the remote control but only by pressing and holding the button on the side of the sole again.
If the red light continues to flash
Possible causes
Cause 1
- The red light blinks when the insoles are ready to be paired with the remote control. Press any button on the remote and the pairing is active.
Cause 2
- The red light also flashes when the battery is low. Put the insoles on the charger.
Cause 3
- Does the red light keep flashing while charging? If so, it could be that the insoles are not fully turned off. In this case, hold down the button on the side of the insole for a few seconds so that the system is completely disabled.
Cause 4
- Is a red or orange light flashing while charging? If so, it could be that something is wrong with the charger. Always use the original charger supplied and not your own cable.
Any questions?
Do you still have questions about pairing the remote control with our insoles PRO and CLASSIC? Then send us an email, we will be happy to help you further.